Tag Archives: Request

[Android] 안드로이드 플랫폼에서 HTTP GET/POST/Multipart POST 요청 처리하기

안드로이드 환경에서 HTTP 요청을 날리기 위해서 할 수 있는 방법으로는 여러가지가 있겠습니다만, POST에서 인코딩된 한글 문자열을 처리한다거나 파일을 첨부한다거나 하는 경우에는 아무래도 생각할것이 많아질 것 같습니다.

간단하게 도움이 될만한 예제를 발견하여 포스팅 해봅니다. 이 예제를 실행해 보기 위해서는 apache-mime4jhttpmime 라이브러리가 필요합니다.

HTTP GET

try
{
  HttpClient client = new DefaultHttpClient();  
  String getURL = "http://www.google.com";
  HttpGet get = new HttpGet(getURL);
  HttpResponse responseGet = client.execute(get);
  HttpEntity resEntityGet = responseGet.getEntity();
  if (resEntityGet != null) {
    // 결과를 처리합니다.
    Log.i("RESPONSE", EntityUtils.toString(resEntityGet));
  }
} catch (Exception e) { e.printStackTrace(); }

HTTP POST

try
{
  HttpClient client = new DefaultHttpClient();  
  String postURL = "http://www.google.com";
  HttpPost post = new HttpPost(postURL); 

  List<NameValuePair> params = new ArrayList<NameValuePair>();
  params.add(new BasicNameValuePair("user", "kris"));
  params.add(new BasicNameValuePair("pass", "xyz"));

  UrlEncodedFormEntity ent = new UrlEncodedFormEntity(params,HTTP.UTF_8);
  post.setEntity(ent);
  HttpResponse responsePOST = client.execute(post);  
  HttpEntity resEntity = responsePOST.getEntity();

  if (resEntity != null)
  {    
    Log.i("RESPONSE", EntityUtils.toString(resEntity));
  }
}
catch (Exception e)
{
  e.printStackTrace();
}

HTTP POST (File Attached)

File file = new File("path/to/your/file.txt");
try
{
  HttpClient client = new DefaultHttpClient();
  String postURL = "http://www.google.com";
  HttpPost post = new HttpPost(postURL);
  FileBody bin = new FileBody(file);
  MultipartEntity reqEntity = new MultipartEntity(HttpMultipartMode.BROWSER_COMPATIBLE);
  reqEntity.addPart("myFile", bin);
  post.setEntity(reqEntity);

  HttpResponse response = client.execute(post);
  HttpEntity resEntity = response.getEntity();

  if (resEntity != null)
  {    
    Log.i("RESPONSE", EntityUtils.toString(resEntity));
  }
}
catch (Exception e)
{
  e.printStackTrace();
}

위의 예제들중에 GET방식 말고는 그야말로 예제에 불과합니다. POST에는 파라미터를 추가하는 예시가 있고 마지막에는 파일을 첨부하는 과정이 정리되어있습니다. 이를 응용하여 다양한 형태의 서버와의 통신을 구현하실 수 있습니다.

사용자 삽입 이미지

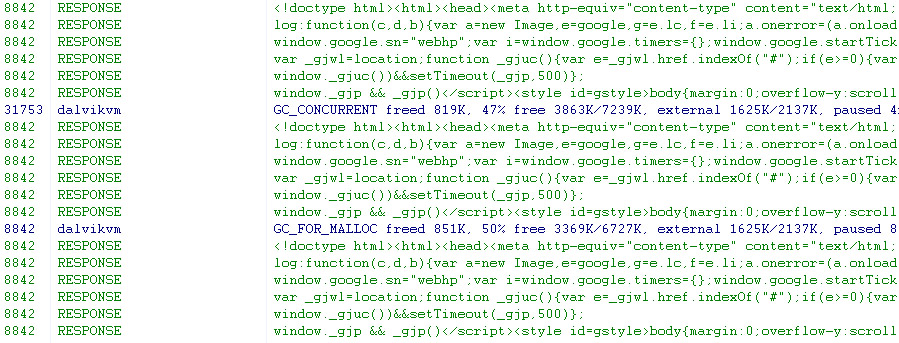
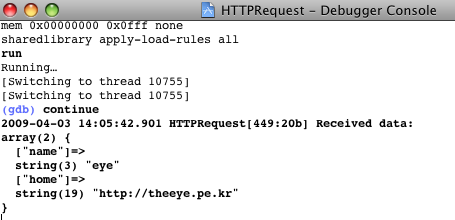
결과를 대충 찍어봤는데 잘 나오는군요.

http://james.apache.org/download.cgi
http://hc.apache.org/downloads.cgi
http://www.softwarepassion.com/android-series-get-post-and-multipart-post-requests/

[iPhone] HTTP Request/Response Wrapper 클래스 만들기

간단하게 HTTP 통신을 할 수 있는 방법을 찾던중에 매우 귀중한 자료를 보게 되었습니다.

iphoneos 커뮤니티의 강좌게시판에 있는 자료인데, 종이비행기님이 작성하신 [링크] 글입니다.

매우 설명을 친절하게 잘 써주셨습니다. 지금 제가 쓰는 글은 종이비행기님이 기 작성하신 글을 참고하여 조금 수정한 것임을 미리 알립니다.

종이비행기님이 작성하신 강좌를 조금 더 쓰기 편하게 추가해 보았습니다. 추가 된 사항은 델리게이트를 설정하여 데이터 수신이 끝나는 시점에 내가 원하는 메서드를 호출하여 데이터를 받아 볼 수 있게 하였고요, POST로 데이터를 전송할 때 함께 보낼 Body 데이터를 NSDictionary를 사용하면 자동으로 변환되도록 하였습니다.

HTTPRequestAppDelegate.m
[code]- (void)applicationDidFinishLaunching:(UIApplication *)application {
    // 접속할 주소 설정
    NSString *url = @”http://your.webpage.url”;
   
    // HTTP Request 인스턴스 생성
    HTTPRequest *httpRequest = [[HTTPRequest alloc] init];
   
    // POST로 전송할 데이터 설정
    NSDictionary *bodyObject = [NSDictionary dictionaryWithObjectsAndKeys:@”eye”,@”name”,@”http://theeye.pe.kr”, @”home”, nil];
   
    // 통신 완료 후 호출할 델리게이트 셀렉터 설정
    [httpRequest setDelegate:self selector:@selector(didReceiveFinished:)];
   
    // 페이지 호출
    [httpRequest requestUrl:url bodyObject:bodyObject];
   
    [window makeKeyAndVisible];
}[/code]
HTTPRequest.h
[code]#import <Foundation/Foundation.h>
 
@interface HTTPRequest : NSObject
{
    NSMutableData *receivedData;
    NSURLResponse *response;
    NSString *result;
    id target;
    SEL selector;
}
 
– (BOOL)requestUrl:(NSString *)url bodyObject:(NSDictionary *)bodyObject;
– (void)connection:(NSURLConnection *)connection didReceiveResponse:(NSURLResponse *)aResponse;
– (void)connection:(NSURLConnection *)connection didReceiveData:(NSData *)data;
– (void)connection:(NSURLConnection *)connection didFailWithError:(NSError *)error;
– (void)connectionDidFinishLoading:(NSURLConnection *)connection;
– (void)setDelegate:(id)aTarget selector:(SEL)aSelector;
 
@property (nonatomic, retain) NSMutableData *receivedData;
@property (nonatomic, retain) NSURLResponse *response;
@property (nonatomic, assign) NSString *result;
@property (nonatomic, assign) id target;
@property (nonatomic, assign) SEL selector;
 
@end[/code]
HTTPRequest.m
[code]#import “HTTPRequest.h”

@implementation HTTPRequest

@synthesize receivedData;
@synthesize response;
@synthesize result;
@synthesize target;
@synthesize selector;

– (BOOL)requestUrl:(NSString *)url bodyObject:(NSDictionary *)bodyObject
{
    // URL Request 객체 생성
    NSMutableURLRequest *request = [NSMutableURLRequest requestWithURL:[NSURL URLWithString:url]
                                                           cachePolicy:NSURLRequestUseProtocolCachePolicy
                                                       timeoutInterval:5.0f];
   
    // 통신방식 정의 (POST, GET)
    [request setHTTPMethod:@”POST”];
   
    // bodyObject의 객체가 존재할 경우 QueryString형태로 변환
    if(bodyObject)
    {
        // 임시 변수 선언
        NSMutableArray *parts = [NSMutableArray array];
        NSString *part;
        id key;
        id value;
       
        // 값을 하나하나 변환
        for(key in bodyObject)
        {
            value = [bodyObject objectForKey:key];
            part = [NSString stringWithFormat:@”%@=%@”, [key stringByAddingPercentEscapesUsingEncoding:NSUTF8StringEncoding],
                                                        [value stringByAddingPercentEscapesUsingEncoding:NSUTF8StringEncoding]];
            [parts addObject:part];
        }
       
        // 값들을 &로 연결하여 Body에 사용
        [request setHTTPBody:[[parts componentsJoinedByString:@”&”] dataUsingEncoding:NSUTF8StringEncoding]];
    }
   
    // Request를 사용하여 실제 연결을 시도하는 NSURLConnection 인스턴스 생성
    NSURLConnection *connection = [[[NSURLConnection alloc] initWithRequest:request delegate:self] autorelease];
   
    // 정상적으로 연결이 되었다면
    if(connection)
    {
        // 데이터를 전송받을 멤버 변수 초기화
        receivedData = [[NSMutableData alloc] init];
        return YES;
    }
   
    return NO;
}

– (void)connection:(NSURLConnection *)connection didReceiveResponse:(NSURLResponse *)aResponse
{
    // 데이터를 전송받기 전에 호출되는 메서드, 우선 Response의 헤더만을 먼저 받아 온다.
    //[receivedData setLength:0];
    self.response = aResponse;
}

– (void)connection:(NSURLConnection *)connection didReceiveData:(NSData *)data
{
    // 데이터를 전송받는 도중에 호출되는 메서드, 여러번에 나누어 호출될 수 있으므로 appendData를 사용한다.
    [receivedData appendData:data];
}

– (void)connection:(NSURLConnection *)connection didFailWithError:(NSError *)error
{
    // 에러가 발생되었을 경우 호출되는 메서드
    NSLog(@”Error: %@”, [error localizedDescription]);
}

– (void)connectionDidFinishLoading:(NSURLConnection *)connection
{
    // 데이터 전송이 끝났을 때 호출되는 메서드, 전송받은 데이터를 NSString형태로 변환한다.
    result = [[NSString alloc] initWithData:receivedData encoding:NSUTF8StringEncoding];
   
    // 델리게이트가 설정되어있다면 실행한다.
    if(target)
    {
        [target performSelector:selector withObject:result];
    }
}

– (void)setDelegate:(id)aTarget selector:(SEL)aSelector
{
    // 데이터 수신이 완료된 이후에 호출될 메서드의 정보를 담고 있는 셀렉터 설정
    self.target = aTarget;
    self.selector = aSelector;
}

– (void)dealloc
{
    [receivedData release];
    [response release];
    [result release];
    [super dealloc];
}

@end[/code]
위의 예제를 잠깐 다시 살펴보면 requestUrl:bodyObject: 가 호출될 때 bodyObject를 자동으로 queryString으로 변환하여 Request를 보내게 됩니다.

이후에 setDelegate:selector:를 통해 설정한 셀렉터 정보를 가지고 데이터 수신이 끝나 connectionDidFinishLoading: 가 호출되는 시점에 해당 메서드를 호출하게 됩니다. 테스트는 인터넷이 되는 환경에서 해야하고 다음과 같이 잘 되는것을 알 수 있습니다.
사용자 삽입 이미지1391674733.zip
참고 : http://iphoneos.co.kr/zbxe/5718