Tag Archives: Framework

[Flex + Spring] Annotation 기반 Flex BlazeDS 서비스 개발하기

Flex 개발을 하다보면 서버와의 통신을 통해 다양한 방법을 사용할수 있다는 장점을 쉽게 알 수 있습니다.

하지만 안타까운게 Remote Object를 사용하기 위해서는 얼마인지 산출하기도 힘든 비싼 FDS (LCDS)를 구매해야 한다는 장벽이 있었죠.

이 장벽에 막혀 안정성이 확보되지 못한 일부 오픈 소스제품군을 사용하거나 다른 방식의 통신을 사용하여야 했습니다.

하지만 LCDS의 빠른 속도를 보장받을수는 없었죠. 현재 LCDS의 Remote Object 통신 프로토콜은 AMF3 (Action Message Format 3)까지 나왔습니다.

하지만 Adobe에서 BlazeDS라는 이름의 LCDS 무료버젼을 내놓았습니다. 또한 오픈소스로 개발 진행중입니다.

또한 Jeff Vroom 이라는 멋진 분이 Spring ↔ BlazeDS 간 통신할 수 있는 Factory를 개발하였습니다.

관련 정보는 다음을 참고하세요

[ 어도비 기술문서 ]
[ Sewon님 블로그 ]
[ 머드초보님 블로그 ]

하지만 위의 기술 내용들은 Spring Framework를 이용하여 어노테이션 기반으로 개발중이라면 여간 성가시게 만드는 부분이 많지 않은가 싶습니다.

위의 내용도 매우 간단해 지고 쉬워졌지만 BlazeDS도 어노테이션을 이용해 연동할 수 있으면 얼마나 좋을까 생각하게 만들었습니다.

그러던중에 좋은 자료를 발견하였습니다.

1. Spring에서 @RemotingDestination 어노테이션을 사용하기 위해 다음의 라이브러리를 다운받습니다. 여기에는 Jeff Vroom씨가 만든 Spring Factory도 포함하고 있습니다.

[ 다운받으러 가기 ]

2. remotingdestination-annotation.zip 파일을 개발중인 프로젝트의 WEB-INF/lib 디렉토리에 넣어줍니다.

3. BlazeDS의 설정파일인 services-config.xml 에 SpringAutowiringBootStrapService를 등록해 줍니다.
[code]<?xml version=”1.0″ encoding=”UTF-8″?>
<services-config>
    <services>
        <service-include file-path=”remoting-config.xml” />
        <service-include file-path=”proxy-config.xml” />
        <service-include file-path=”messaging-config.xml” />
            <service id=”spring-autowiring-bootstrap-service”
                class=”flex.contrib.services.SpringAutowiringBootstrapService”/>
        <default-channels>
            <channel ref=”my-amf”/>
        </default-channels>
    </services>


….

    <factories>
        <factory id=”spring” class=”flex.contrib.factories.flex.SpringFactory” />
    </factories>
</services-config>[/code]
SpringAutowiringBootStrapService은 BlazeDS 로딩시에 모든 @RemotingDestination 어노테이션이 포함된 클래스를 등록합니다. 이것은 Spring Factory를 통해 동적으로 Spring의 Bean을 불러다 사용할 수 있음을 뜻합니다. 밑에 추가한 factory의 경우 id는 꼭 spring이어야 합니다.

4. 마지막으로 당신의 서비스 클래스에 @RemotingDestination 어노테이션을 붙여줍니다.
[code]package flex.contrib.samples.mortgage;


import org.springframework.beans.factory.annotation.Autowired;
import flex.contrib.stereotypes.RemotingDestination;


@RemotingDestination(destination=”mortgageService”)
public class Mortgage {
    @Autowired RateFinder rateFinder;
    public void setRateFinder(RateFinder rateFinder) {
        this.rateFinder = rateFinder;
    }


    public double calculate(double amount) {
        int term = 360; // 30 years
        double rate = rateFinder.findRate();
        return (amount*(rate/12)) / (1 – 1 /Math.pow((1 + rate/12), term));
    }
}[/code]

5. 물론 Spring에서 component-scan과 annotation-config를 설정해 주는걸 잊지 말자고요.
[code]<?xml version=”1.0″ encoding=”UTF-8″?>
<beans xmlns=”http://www.springframework.org/schema/beans
       xmlns:xsi=”http://www.w3.org/2001/XMLSchema-instance
       xmlns:context=”http://www.springframework.org/schema/context
       xsi:schemaLocation=”http://www.springframework.org/schema/beans
            http://www.springframework.org/schema/beans/spring-beans-2.5.xsd
            http://www.springframework.org/schema/context
            http://www.springframework.org/schema/context/spring-context-2.5.xsd“>


    <context:annotation-config/>
    <context:component-scan base-package=”flex.contrib.samples”/>
</beans>[/code]

6. Flex 에서는 다양한 방법의 Remote Object 통신방법으로 서버의 서비스에 직접 접근할 수 있게 됩니다.
[code]var amfChannel:AMFChannel = new AMFChannel(“my-amf”, “http://localhost/messagebroker/amf“);
var channelSet:ChannelSet = new ChannelSet();
channelSet.addChannel(amfChannel);
   
var remoteObject:RemoteObject = new RemoteObject();
remoteObject.channelSet = channelSet;
remoteObject.destination = “mortgageService”;
remoteObject.addEventListener(ResultEvent.RESULT, resultHandler);
remoteObject.addEventListener(FaultEvent.FAULT, faultHandler);
remoteObject.calculate(5);[/code]

+. @RemotingDestination에서 지정한 destination이 Flex에서 지정하는 destination이 됩니다. 주의할점이 하나 있는데 web.xml의 contextConfigLocation 설정에서 정의한 컨텍스트의 Bean만 가져올 수 있습니다.

참고자료 : http://marceloverdijk.blogspot.com/2008/01/code-by-convention-with-flex-and-spring.html

Spring 2.5 어노테이션 기반 개발을 위한 Blank 프로젝트 생성

스프링 개발을 위한 준비를 해봅시다. 이 자료는 개인적인 학습 용도로 사용하시고, 회사에서의 사용은 회사의 정해진 설정 방법에 따라 사용하시기 바랍니다

사용자 삽입 이미지
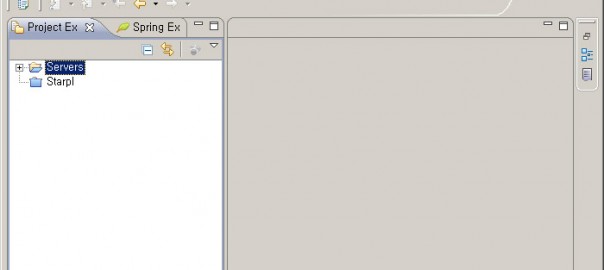
이클립스를 실행했을때의 모습입니다. 우측과 하단의 메뉴는 자리가 부족하여 일단 숨겨놨습니다.

사용자 삽입 이미지File – New – Project 를 선택합니다. Wizards에 dy까지만 쳐보시면 Dynamic Web Project라고 있습니다.

사용자 삽입 이미지
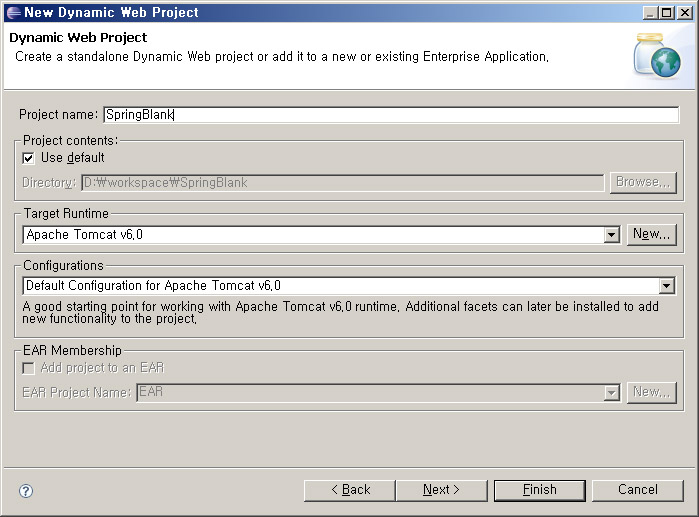
프로젝트를 생성합니다. Project name에 적절한 이름을 정해주고 Target Runtime에는 Apache Tomcat 6를 선택합니다. 없다면 오른쪽의 New를 선택하여 Tomcat을 추가해 줍시다. 이후 Finish를 누릅니다. 세부 설정을 하실려면 Next를 누르시면 됩니다.

사용자 삽입 이미지
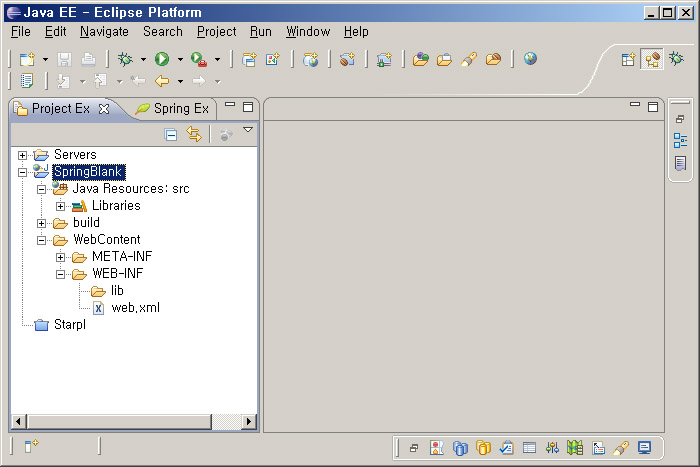
보시는것과 같이 프로젝트가 생성되었습니다. Dynamic Web Project의 경우 웹 개발을 위한 대부분의 요소가 자동 생성됩니다.

사용자 삽입 이미지
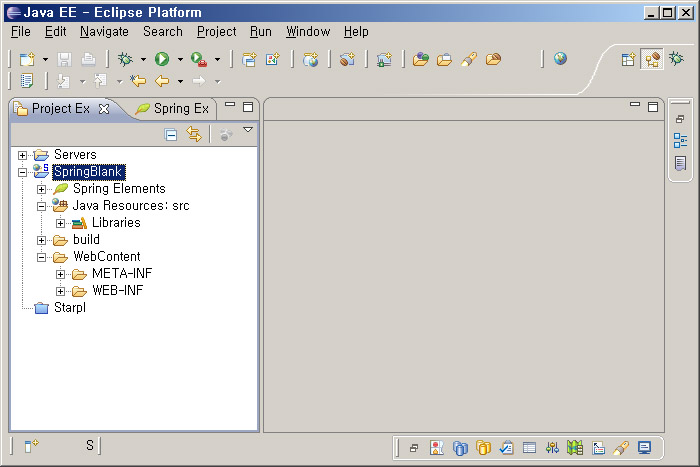
프로젝트에 오른쪽 클릭 후 Spring Tools – Add Spring Project Nature를 선택하여 Spring IDE설정을 추가합니다.

WEB-INF 파일 밑에 다음의 디렉토리들을 생성합시다.


  • conf : 스프링의 컨텍스트 설정 파일을 분리하여 모아두기 위한 디렉토리

  • jsp : MVC 프로그래밍에서 중요한 View인 JSP를 모아두기 위한 디렉토리, 다른 View를 사용한다면 다른 이름을 추천

  • log : log4j 설정 파일을 넣어두기 위한 디렉토리

WE-INF/lib 디렉토리에 필요한 라이브러리들을 추가해 봅시다. 지금 적는 모든 파일은 spring-dependencies 패키지에 포함되어있습니다.
[code]antlr-2.7.6.jar
asm-2.2.3.jar
asm-commons-2.2.3.jar
asm-util-2.2.3.jar
aspectjrt.jar
aspectjweaver.jar
cglib-nodep-2.1_3.jar
commons-beanutils.jar
commons-codec.jar
commons-collections.jar
commons-dbcp.jar
commons-digester.jar
commons-discovery.jar
commons-fileupload.jar
commons-httpclient.jar
commons-io.jar
commons-lang.jar
commons-logging.jar
commons-pool.jar
commons-validator.jar
jstl.jar
junit-4.4.jar
log4j-1.2.15.jar
spring.jar
spring-agent.jar
spring-aspects.jar
spring-test.jar
spring-web.jar
spring-webmvc.jar
standard.jar[/code]
더 필요하신것을 추가하시거나 빼셔도 됩니다. 다음으로는 중요한 설정 파일들을 설정해 봅시다.

/WEB-INF/web.xml
[code]<?xml version=”1.0″ encoding=”UTF-8″?>
<web-app xmlns:xsi=”http://www.w3.org/2001/XMLSchema-instance” xmlns=”http://java.sun.com/xml/ns/javaee” xmlns:web=”http://java.sun.com/xml/ns/javaee/web-app_2_5.xsd” xsi:schemaLocation=”http://java.sun.com/xml/ns/javaee http://java.sun.com/xml/ns/javaee/web-app_2_5.xsd” id=”WebApp_ID” version=”2.5″>


 <!–
  GENERAL CONFIGURATIONS
  –>
 <display-name>SpringBlank</display-name>
 
 <!–
  REQUEST CHARSET ENCODING CONFIGURATIONS
  –>
 <filter>
  <filter-name>Request Encoding</filter-name>
  <filter-class>org.springframework.web.filter.CharacterEncodingFilter</filter-class>
  <init-param>
   <param-name>encoding</param-name>
   <param-value>UTF-8</param-value>
  </init-param>
 </filter>


 <filter-mapping>
  <filter-name>Request Encoding</filter-name>
  <servlet-name>spring</servlet-name>
 </filter-mapping>
 
 <!–
  SPRING FRAMEWORK DISPATCHER SERVLET CONFIGURATIONS
  –>
 <servlet>
  <servlet-name>spring</servlet-name>
  <servlet-class>org.springframework.web.servlet.DispatcherServlet</servlet-class>
  <load-on-startup>2</load-on-startup>
 </servlet>


 <servlet-mapping>
  <servlet-name>spring</servlet-name>
  <url-pattern>*.do</url-pattern>
 </servlet-mapping>


 <!–
  CONTEXT LOADER CONFIGURATIONS
  –>
 <context-param>
  <param-name>contextConfigLocation</param-name>
  <param-value>/WEB-INF/conf/**-context.xml</param-value>
 </context-param>


 <listener>
  <listener-class>org.springframework.web.context.ContextLoaderListener</listener-class>
 </listener>


 <!–
  LOG4J LOGGER CONFIGURATIONS
  –>
 <context-param>
  <param-name>log4jConfigLocation</param-name>
  <param-value>/WEB-INF/log/log4j.properties</param-value>
 </context-param>


 <listener>
  <listener-class>org.springframework.web.util.Log4jConfigListener</listener-class>
 </listener>
 
</web-app>[/code]

/WEB-INF/spring-servlet.xml
[code]<?xml version=”1.0″ encoding=”UTF-8″?>
<beans xmlns=”http://www.springframework.org/schema/beans
 xmlns:xsi=”http://www.w3.org/2001/XMLSchema-instance
 xmlns:aop=”http://www.springframework.org/schema/aop
 xmlns:context=”http://www.springframework.org/schema/context
 xmlns:tx=”http://www.springframework.org/schema/tx
 xmlns:util=”http://www.springframework.org/schema/util
 xsi:schemaLocation=”http://www.springframework.org/schema/beans http://www.springframework.org/schema/beans/spring-beans.xsd
  http://www.springframework.org/schema/aop http://www.springframework.org/schema/aop/spring-aop.xsd
  http://www.springframework.org/schema/context http://www.springframework.org/schema/context/spring-context.xsd
  http://www.springframework.org/schema/tx http://www.springframework.org/schema/tx/spring-tx.xsd
  http://www.springframework.org/schema/util http://www.springframework.org/schema/util/spring-util.xsd“>


 <!–
  ANNOTATION CONTEXT DEFINITION
  –>
 <context:component-scan base-package=”*”/>
 <context:annotation-config/>
 <context:spring-configured/>
 
 <!–
  ASPECT ORIENTED PROGRAMMING(ASPECT-J) DEFINITION
  –>
 <aop:aspectj-autoproxy/>
 
 <!–
  VIEW RESOLVER CONFIGURATIONS
  –>
 <bean id=”viewResolver” class=”org.springframework.web.servlet.view.InternalResourceViewResolver”>
  <property name=”viewClass” value=”org.springframework.web.servlet.view.JstlView”/>
  <property name=”prefix” value=”/WEB-INF/jsp/”/>
  <property name=”suffix” value=”.jsp”/>
 </bean>
 
</beans>[/code]

/WEB-INF/log/log4j.properties
[code]# LOG LEVEL : FATAL > ERROR > WARN > INFO > DEBUG


##################################################################################################
#                                         ROOT LOGGER CONFIGURATION                              #
##################################################################################################
log4j.rootLogger=INFO,ROOT


log4j.appender.ROOT=org.apache.log4j.ConsoleAppender
log4j.appender.ROOT.layout=org.apache.log4j.PatternLayout
log4j.appender.ROOT.layout.ConversionPattern=[%d{yyyy-MM-dd HH:mm:ss}]\t%p\t[%F.%M():%L]\t%m%n


##################################################################################################
#                                   SPRING FRAMEWORK LOGGER CONFIGURATION                        #
##################################################################################################
log4j.logger.org.springframework=INFO, SPRING
log4j.additivity.org.springframework=false
log4j.appender.SPRING=org.apache.log4j.ConsoleAppender
log4j.appender.SPRING.layout=org.apache.log4j.PatternLayout
log4j.appender.SPRING.layout.ConversionPattern=[%d{yyyy-MM-dd HH:mm:ss}]\t%p\t[%F.%M():%L]\t%m%n[/code]

이로써 무언가를 개발해보기 위핸 블랭크 프로젝트가 생성되었습니다. 어노테이션 기반의 MVC 프로젝트 및 AOP적용이 가능합니다.