안드로이드의 위젯은 주기적으로 onUpdate를 호출 할 수 있습니다. 다음과 같이 설정할 경우 30분마다 한번씩 위젯을 갱신할 수 있습니다.
하지만 위의 방법은 구글측에서 제한을 두어 최소 30분 이하의 갱신을 수행할 수 없습니다. 이하의 값을 설정할 경우 자동으로 30분 갱신으로 등록이 됩니다. 0을 등록할 경우 슬립모드에 들어갔다가 화면이 켜질경우에 업데이트를 수행하게 됩니다.
이때문에 더 짧은 주기의 업데이트를 수행하기 위해서는 AlarmManager를 활용하여 수동으로 위젯을 업데이트 하는 방법밖에 없어 보입니다. 다행이도 안드로이드에는 다음과 같은 위젯을 업데이트 하기 위한 인텐트 필터가 존재합니다.
저 인텐트를 주기적으로 호출해 주기만 하면 문제가 해결될 수 있을것 같군요. 위젯을 사용하기 위한 방법까지 포함해서 하나하나 정리해 보도록 하겠습니다.
AndroidManifest.xml
<?xml version="1.0" encoding="utf-8"?>
<manifest
  xmlns:android="http://schemas.android.com/apk/res/android"
  package="kr.pe.theeye.widget"
  android:versionCode="1"
  android:versionName="1.0">

  <uses-sdk android:minSdkVersion="7" />

  <application
  android:icon="@drawable/icon"
  android:label="@string/app_name">

  <receiver android:name="HelloWidgetProvider" android:label="위젯테스트">
    <intent-filter>
      <action android:name="android.appwidget.action.APPWIDGET_UPDATE" />
    </intent-filter>
    <meta-data
      android:name="android.appwidget.provider"
      android:resource="@xml/hellowidgetproviderinfo" />
  </receiver>

  </application>
</manifest>
위에서 중요한 부분은 android:name에 AppWidgetProvider를 상속받은 클래스의 클래스명을 적어줘야 한다는 것입니다. android:label에는 위젯을 추가할때에 표시될 위젯의 이름이 표시됩니다. 메타데이터에는 위젯의 기본적인 정보가 적혀있는 XML의 위치를 정의 합니다.
hellowidgetproviderinfo.xml
<?xml version="1.0" encoding="utf-8"?>
<appwidget-provider
xmlns:android="http://schemas.android.com/apk/res/android"
android:initialLayout="@layout/hellowidget_layout"
android:minWidth="220dp"
android:minHeight="72dp"/>
여기서는 위젯의 크기라던가 레이아웃XML파일의 위치를 정의할 수 있습니다. 레이아웃의 크기는 하나의 셀에 74픽셀을 사용하게 됩니다. 하지만 [여기]를 참고해 보면 위젯의 사이즈는 총 크기에서 2픽셀을 빼라고((number of cells * 74) – 2) 되어있군요.
hellowidget_layout.xml
<?xml version="1.0" encoding="utf-8"?>
<LinearLayout xmlns:android="http://schemas.android.com/apk/res/android"
    android:orientation="vertical"
    android:layout_width="fill_parent"
    android:layout_height="fill_parent"
    android:gravity="center"
    android:background="#fff">
<TextView
            android:id="@+id/widgettext"
   android:layout_width="fill_parent"
   android:layout_height="wrap_content"
   android:gravity="center"
   android:text="@string/hello"/>
</LinearLayout>
위의 디자인이 제가 테스트로 사용하기 위한 위젯 디자인입니다. 단순하게 글짜만 바꿀 수 있도록 TextView하나를 사용하였습니다.
HelloWidgetProvider.java
/**
* 위젯의 상태를 주기적으로 갱신하는 예제
*
* @author Eye
* @since 2011.04.01
*/
public class HelloWidgetProvider extends AppWidgetProvider
{
private static final String TAG = "HelloWidgetProvider";
private static final int WIDGET_UPDATE_INTERVAL = 5000;
private static PendingIntent mSender;
private static AlarmManager mManager;
/* (non-Javadoc)
* @see android.appwidget.AppWidgetProvider#onReceive(android.content.Context, android.content.Intent)
*/
@Override
public void onReceive(Context context, Intent intent)
{
super.onReceive(context, intent);
String action = intent.getAction();
// 위젯 업데이트 인텐트를 수신했을 때
if(action.equals("android.appwidget.action.APPWIDGET_UPDATE"))
{
Log.w(TAG, "android.appwidget.action.APPWIDGET_UPDATE");
removePreviousAlarm();
long firstTime = System.currentTimeMillis() + WIDGET_UPDATE_INTERVAL;
mSender = PendingIntent.getBroadcast(context, 0, intent, 0);
mManager = (AlarmManager) context.getSystemService(Context.ALARM_SERVICE);
mManager.set(AlarmManager.RTC, firstTime, mSender);
}
// 위젯 제거 인텐트를 수신했을 때
else if(action.equals("android.appwidget.action.APPWIDGET_DISABLED"))
{
Log.w(TAG, "android.appwidget.action.APPWIDGET_DISABLED");
removePreviousAlarm();
}
}
/* (non-Javadoc)
* @see android.appwidget.AppWidgetProvider#onUpdate(android.content.Context, android.appwidget.AppWidgetManager, int[])
*/
@Override
public void onUpdate(Context context, AppWidgetManager appWidgetManager, int[] appWidgetIds)
{
// 현재 클래스로 등록된 모든 위젯의 리스트를 가져옴
appWidgetIds = appWidgetManager.getAppWidgetIds(new ComponentName(context, getClass()));
super.onUpdate(context, appWidgetManager, appWidgetIds);
final int N = appWidgetIds.length;
for(int i = 0 ; i < N ; i++)
{
int appWidgetId = appWidgetIds[i];
updateAppWidget(context, appWidgetManager, appWidgetId);
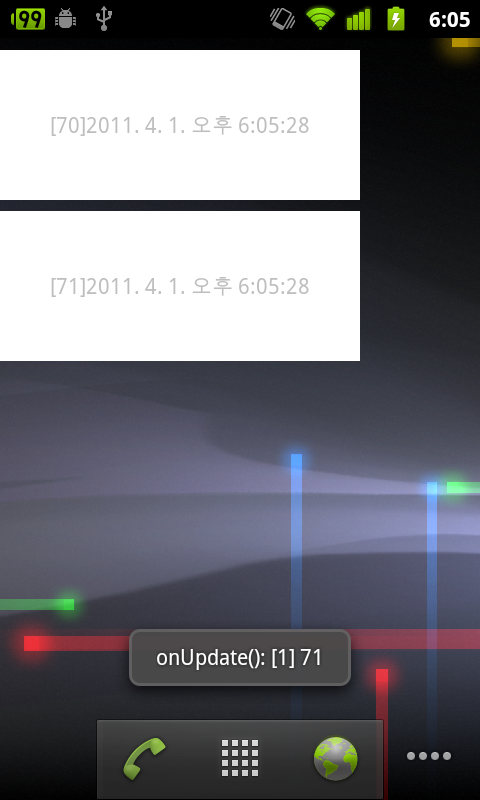
Toast.makeText(context, "onUpdate(): [" + String.valueOf(i) + "] " + String.valueOf(appWidgetId), Toast.LENGTH_SHORT).show();
}
}
/**
* 위젯의 형태를 업데이트합니다.
*
* @param context 컨텍스트
* @param appWidgetManager 위젯 메니저
* @param appWidgetId 업데이트할 위젯 아이디
*/
public static void updateAppWidget(Context context, AppWidgetManager appWidgetManager, int appWidgetId)
{
Date now = new Date();
RemoteViews updateViews = new RemoteViews(context.getPackageName(), R.layout.hellowidget_layout);
updateViews.setTextViewText(R.id.widgettext, "[" + String.valueOf(appWidgetId) + "]" + now.toLocaleString());
appWidgetManager.updateAppWidget(appWidgetId, updateViews);
}
/**
* 예약되어있는 알람을 취소합니다.
*/
public void removePreviousAlarm()
{
if(mManager != null && mSender != null)
{
mSender.cancel();
mManager.cancel(mSender);
}
}
}
여기서 참고해볼점은 위젯이 등록될 때 알람을 등록하고 위젯을 삭제할때 알람을 취소시킨다는것입니다. 또한 다음의 코드를 이용하여 위젯의 숫자와 상관없이 동일하게 갱신할 수 있도록 할 수 있습니다.
int[] appWidgetIds = appWidgetManager.getAppWidgetIds(new ComponentName(context, getClass()));
위의 코드를 사용하면 현재의 WidgetProvider를 사용한 모든 홈스크린에 등록된 위젯들의 ID를 얻어올 수 있습니다.
[샘플코드 다운로드]